SoulCalibur VI: Libra of Souls guide

When you fancy a change of pace from Soulcalibur VI‘s Arcade Mode, chances are you’ll spend a fair amount of time in its other main single-player campaign, the Libra of Souls. In it you can create your own character and are taken through a journey exploring the world uncovering the mysteries of the Evil Seed and it’s accompanying Astral Fissures, which are causing havoc.
It’s a fairly meaty portion of the game, and can seem daunting at first, but we’ve got you covered with our beginner’s guide that will have you mastering what’s going on in no time.
Creating your character
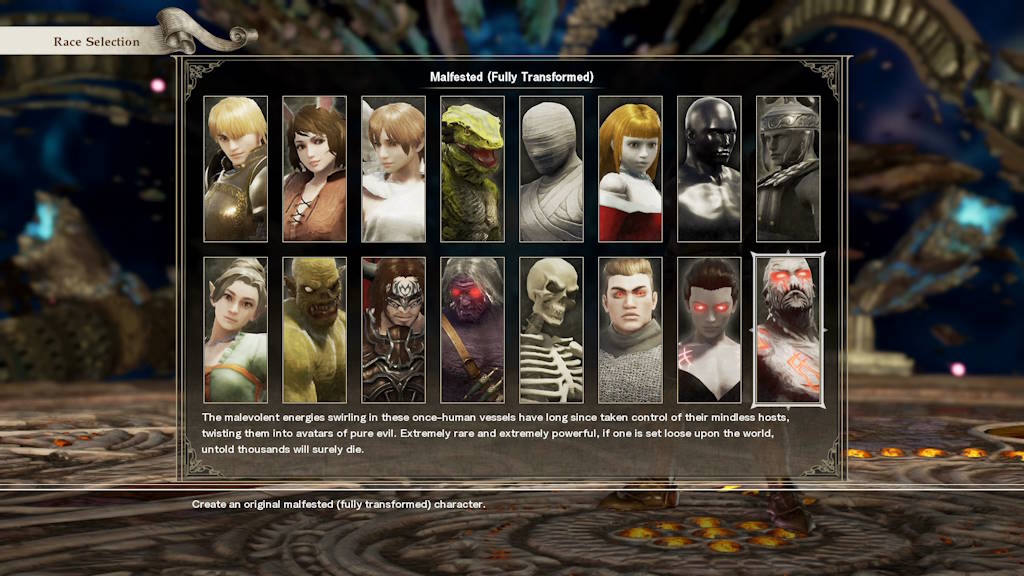
The main difference between this single-player campaign and other modes is that in Libra of Souls, you can create a unique character to play as throughout, rather than one of the pre-made characters on the roster. You begin by selecting a race from a selection of 16 (see above picture) ranging from humans, to the undead, to cyborgs, to even the malfested – the game’s evil incarnations made by the corrupted Evil Seed. Once you’ve chosen a race, you can also choose your gender and build of your character.
Once those general selections have been made, you then can get into the customisation of your character proper, with a wide range of attributes that you can alter to create a protagonaist to be proud of. You can choose from a wide array of different face models, hairstyle and colours, you can tweak the design of your character’s eyebrows and eye colour if you so wish, amend their voice to perfect that warrior’s call, and even give your character extra features such as horns.
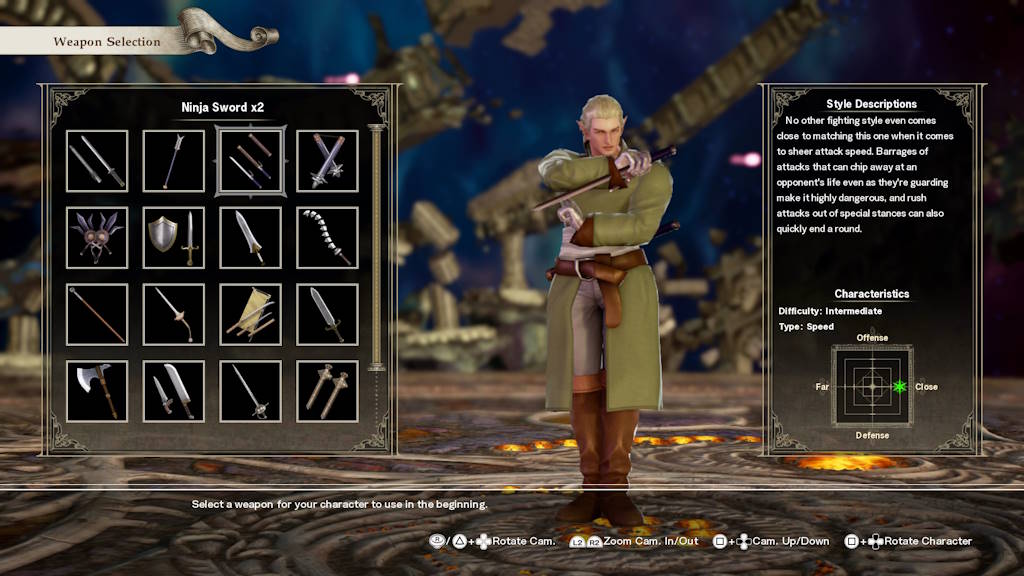
With that complete, you move onto selecting your weapon. It’s worth noting a couple of things at this point. Firstly that you’re not just selecting a weapon here, but also a preset character fighting style that goes along with it. So if you were to choose, for example, the 2x Longsword option, those weapons belong to Geralt, and so your move-list will be identical to Geralt’s in the game. The second point to just be aware of is that this isn’t permanent. You can chop and change weapons as you find them in game (more later), and switch up what style you are using. So this is really just choosing which weapon you wish to start Libra of Souls with.
Once you’ve chosen, the last thing you need to do, is choose your name for the adventure and begin.
Visit the Dojo right away
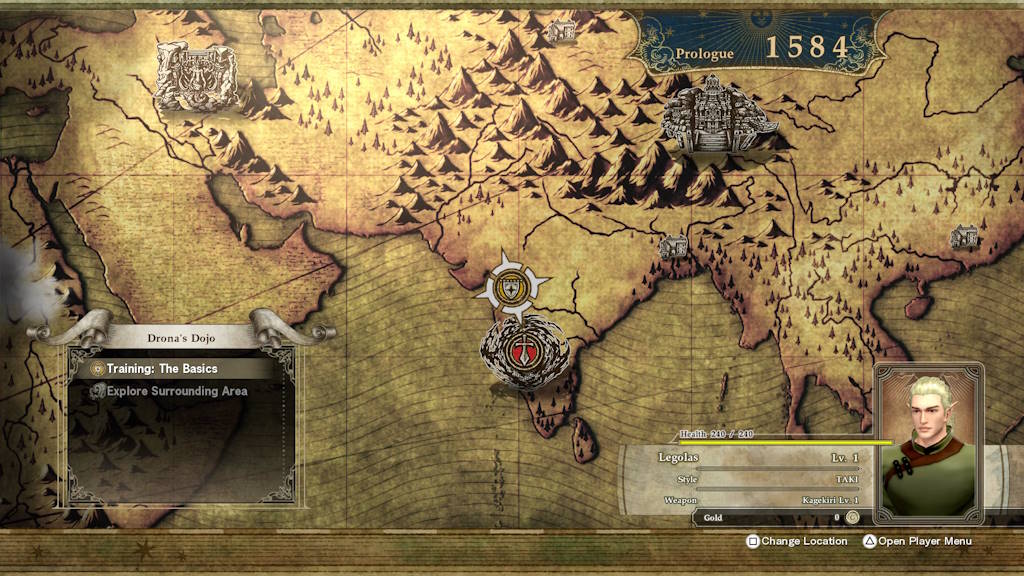
Once you’ve witnessed a brief story section, you’ll come face to face with the map screen, where you can move from mission to mission during Libra of Souls. You can either continue the main story quest (highlighted by a red circle) or indulge in side-quests as they become unlocked (blue circles). The other option is to head for the yellow icon, which is Drona’s Dojo, and it is highly recommended you do this straightaway before continuing the main story.
At Drona’s Dojo, you will meet Drona who will show you the ropes of combat in Soulcalibur VI, by way of a training mode, interspersed with dialogue. Completing his various training techniques will put you in good stead to tackle the sprawling Libra of Souls quest that awaits you.
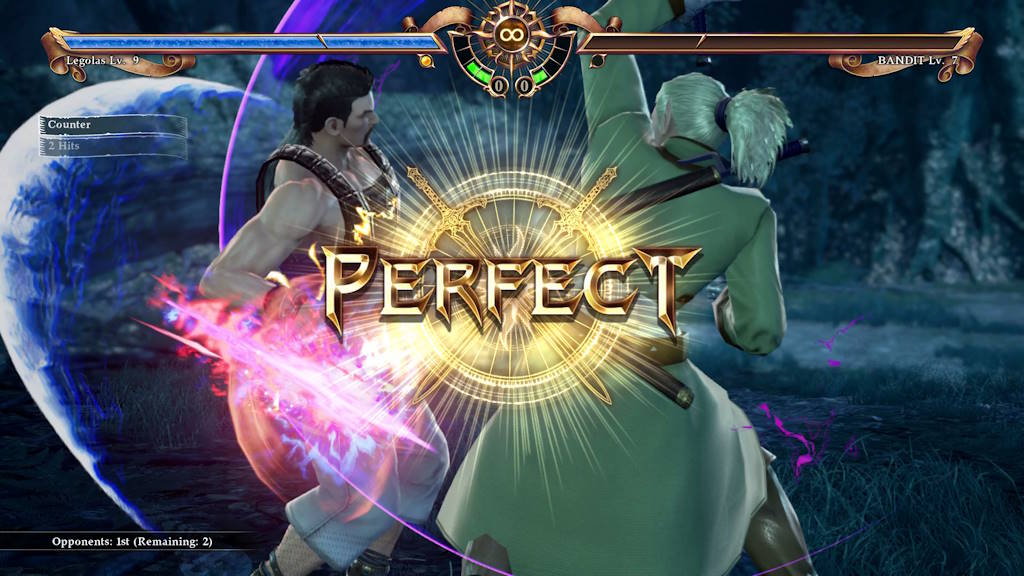
In it you will learn the basics of movement, different attacks and combo potential.You will learn about blocking, throwing your opponent as well as dodging attacks.All of these will help you react better generally in a fight if mastered. Even if you’re a veteran of 3D fighting games it is still worth investing time in training, due to the different types of special moves you will learn that are unique to the Soulcaibur series. You’ll understand the difference between a Reversal Edge, with its tactics and follow up moves, and the Soul Charge, a move that if it initially connects when charged can do devastating damage. You’ll also embrace more complex moves such a Lethal Attacks, and how to stun and counter opponent’s moves.
Fundamentally the training prepares you for what’s to come, and gives you the best possible head-start on your adventure. Completing the training also opens up some additional side missions after the story has progressed a bit more, so keep an eye out for those.
Tipping the Scales
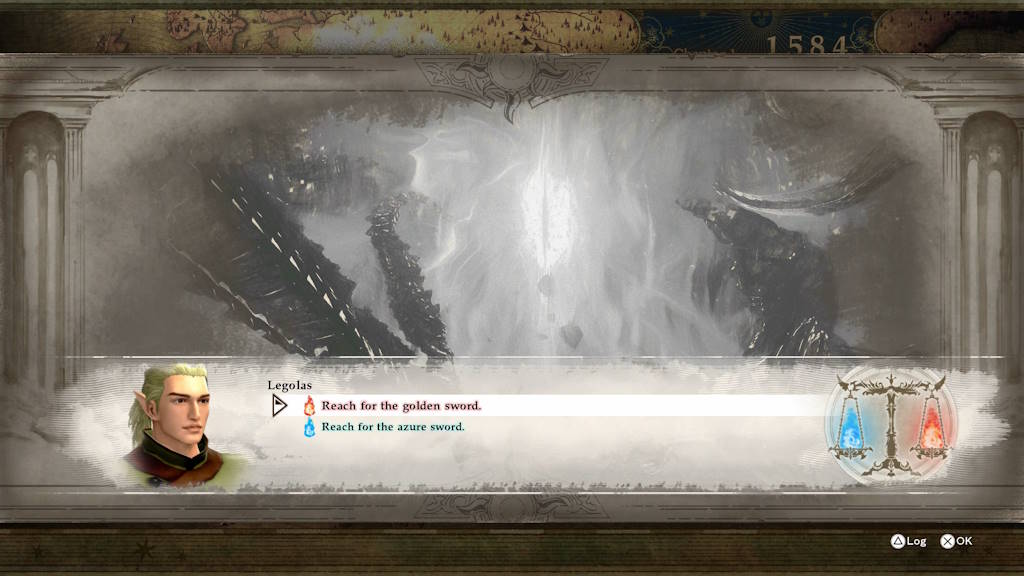
And so we come to the crux of things, the Libra of Souls itself. Not long into the story, you’ll be presented with your first choice. In a dream, you’re presented with two swords to choose from, and depending on what you choose, a couple of things will happen. Firstly each choice option will either be coloured red (signifying an evil choice) or blue (signifying a good choice) and choosing one of the other will tip the Libra of Souls (essentially a balancing scale) in favour of your choice.
Your selection impacts the immediate story itself, but also the current position of the Libra of Souls also affects what missions are available to you as you progress the story. In this particular playthrough I chose the “good” option of the azure sword, and so for me the Libra of Souls tipped in favour of good. This meant that missions deemed “good” were now available to me. To help you keep track of where the balance currently is, an icon is added to bottom-right of the map screen, should you ever need a reminder.

As you can probably imagine, what this does mean is that by choosing one option, like most decision-based stories, you are locking out content of the other option. There is no save, and re-do option here, so it’s better to just make the choices that feel right to you, and enjoy the story and side missions as they are.
It’s worth noting that the game mode supports up to 9 different saves, meaning that if you want you can freely create a second character and choose different options and see what new missions open up for you, and fully experience all the Libra of Souls has to offer.
Keep an eye on your inventory
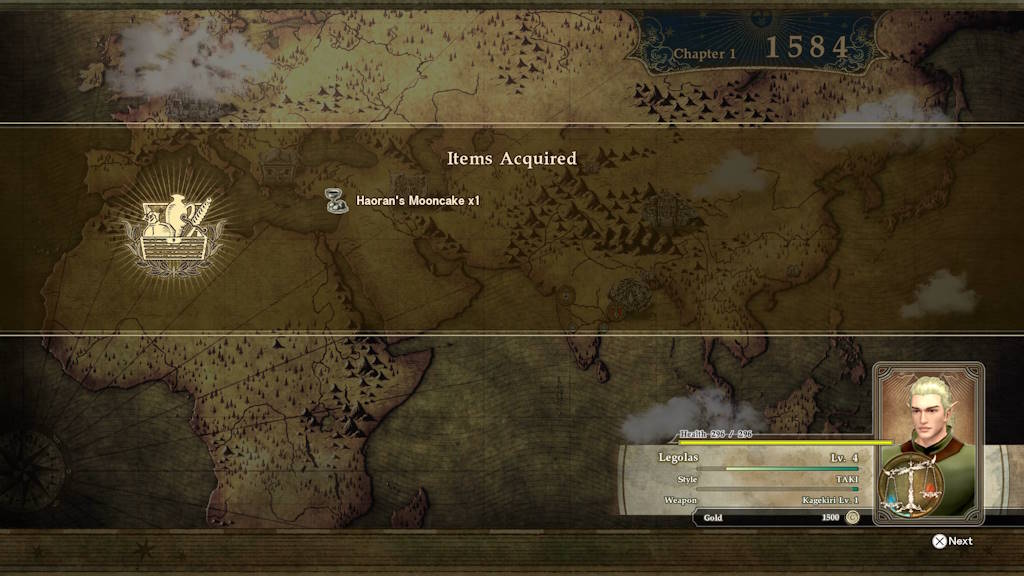
After a few more fights you’ll begin to start receiving items after victory in a mission.These items will be one of two types. The first is food, such as Haoran’s Mooncake above, that bestow various effects on you for an upcoming mission. You may have noticed that before every fight, on the screen that shows your upcoming enemies, there is an option to consume some food with a press of a button (square button PS4, X button on Xbox One).
The positive effects of food vary depending on what is consumed. Some increase your health for the next fight, make you quicker, some makes you less susceptible to damage etc. Some even affects the effectiveness of specific moves such as your Soul Charge. Needless to say, these items can clearly give you the edge in a tricky fight. However, note that when a food item is consumed it is gone forever, and so make sure you definitely want to use it on that particular fight before you use it.
The other type of item you could come across, although rarer, are new weapons. Most likely, but not always, these weapons will be of the same type that you chose at the start of the adventure, although likely stronger than what you have at the moment. Much like food, you have the option of changing your weapons before each fight, if you want to mix up your style, or switch to a newfound, more powerful weapon.
As well as different damage ranges, some weapons also come imbued with additional abilities like those bestowed on your from food, but permanent. When making a decision about which weapon to use always consider the additional abilities as well as the damage. It may be that a lower damage weapon, but with a useful ability will get your further than simply raw power. The final thing to note is that weapons have levels, just like your character, and you can only use them if your character has reached that level or higher. You won’t be able to equip weapons at a higher level than you.
Pay attention to the Mission Info screen
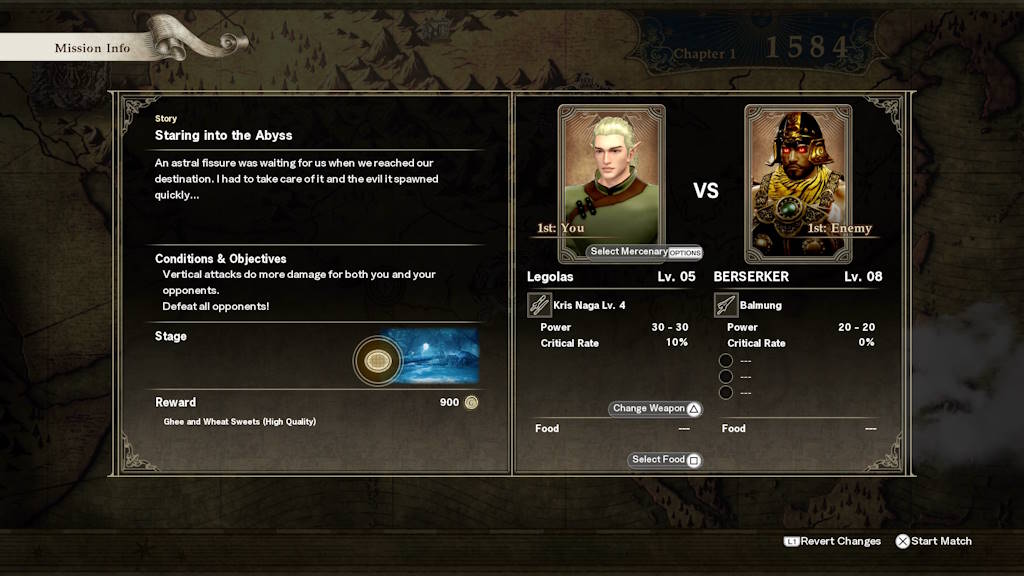
As well as being an opportunity to change your weapon and select your food, the Mission Info screen also houses a lot of other information that could help you defeat your foe.
Firstly on the right-hand side of the screen you get some information about your upcoming enemies. If there are more than one of them, a quick press of the right-trigger button will cycle through them each in turn. You can see what level enemy they are, as a gauge of their toughness compared to you, as well as seeing what type of weapon they will be using and how strong it is. With this information, you can better prepare yourself for the fight, knowing if the enemy is for example, wielding a big heavy axe or a light, quick sword, will change how you approach the fight.
On the left-hand side of the screen you also get some other useful information. For starters you get see the shape of the stage, and can see if there are any solid walls that will prevent a Ring Out on a certain side. You can also see what rewards you will get for completing the mission, namely some gold, and then any food or weapons.
But perhaps the single most important piece of information on this screen is the “Condition & Objectives” section. In it, the game details any special conditions the fight will be fought under, and some can be very specific. The Soulcalibur series has always thrown up these different objectives to spice up what would otherwise be repetitive matches, and so it’s important to understand how they work in each instance.
Sometimes these objectives could be that a particular attack does more damage than usual, or in extreme cases, only a specific type of attack will do any damage at all. In some cases, the speed and health of your and/or your opponent could have been altered, or the starting point of your Soul Gauge could also be different to normal. Knowing what type of fight you’re going into can make all the difference between success and failure, and give you the upper hand against the enemy.
Shops and Towns
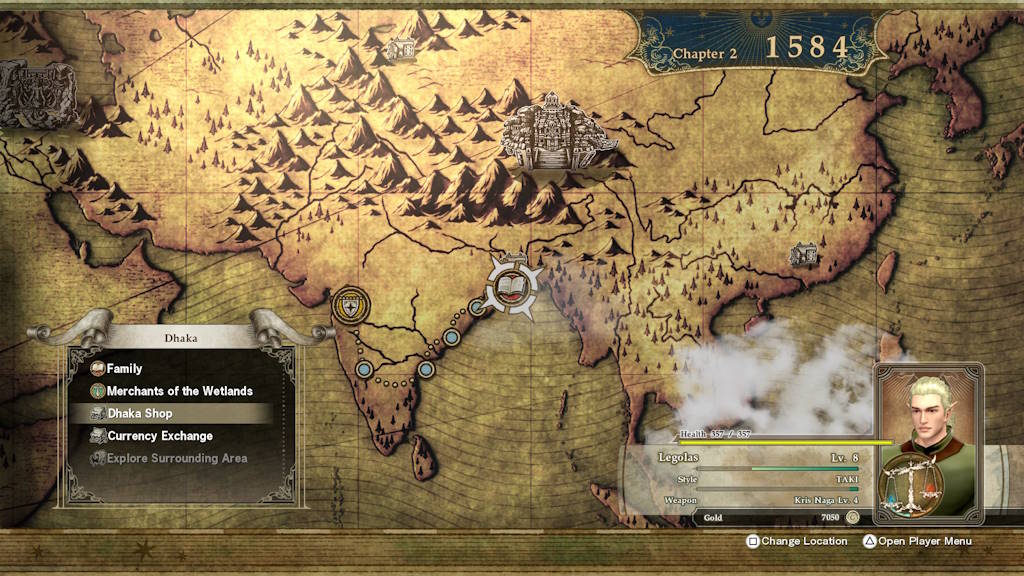
As you progress even further with the story you will encounter numerous towns throughout the world that open up some options to you to aid you in your quest. The first is the access to the Town’s Shop, which allows you to spend the gold you have been earning on both food and weapons that they have in stock. It’s always good to check what’s on offer, as better food or weapons could make all the difference in the fights to come.
Alongside the traditional shop, there is also an option to use the Currency Exchange. Here you can choose to spend some of your gold in exchange for Soul Points, a currency in the game that spans all of the different modes. Chances are you’ll have already picked up some Soul Points by completing the main arcade mode or competing online. Soul Points are used in the Museum mode of the game to unlock special lore and history about the story and characters. Should you wish to you can swap 5,000 gold for 100 Soul Points, but I would only advise on doing so if you feel you still have a reasonable buffer of gold. This is especially important as a new way to spend it is about to be unlocked in a short while.
The other thing to note about towns is that as well as hosting the main story, they will also often have blue side missions that you can select, such as the “Merchants of the Wetlands” mission in the town of Dhaka, in the screenshot above. Completing these increases the town’s level. As a town’s level increases, it stocks more items in the shops, meaning it’s well worth looking to complete these side missions to increase the options available to you.
Explore the World!

Before long, you’ll unlock the option to actually use that “Explore Surrounding Area” option that has been greyed out on the map screen up until this point. When you do, a variety of side missions will unlock off the track of the main story. To reach them, you need to go into exploration mode, and journey from a point on the map to another.
The longer your expedition, the more gold you will need to fund it, so it’s always advisable to plan out the shortest route between missions if you intend to tick off multiple side missions in one go. This way you won;t waste your money unnecessarily and can use it to buy better items when you need to. You’ll also notice that some missions have a face image above them, and this will be because a previous conversation (say with Drona back at the Dojo) has encouraged you to go and visit someone in a key location.
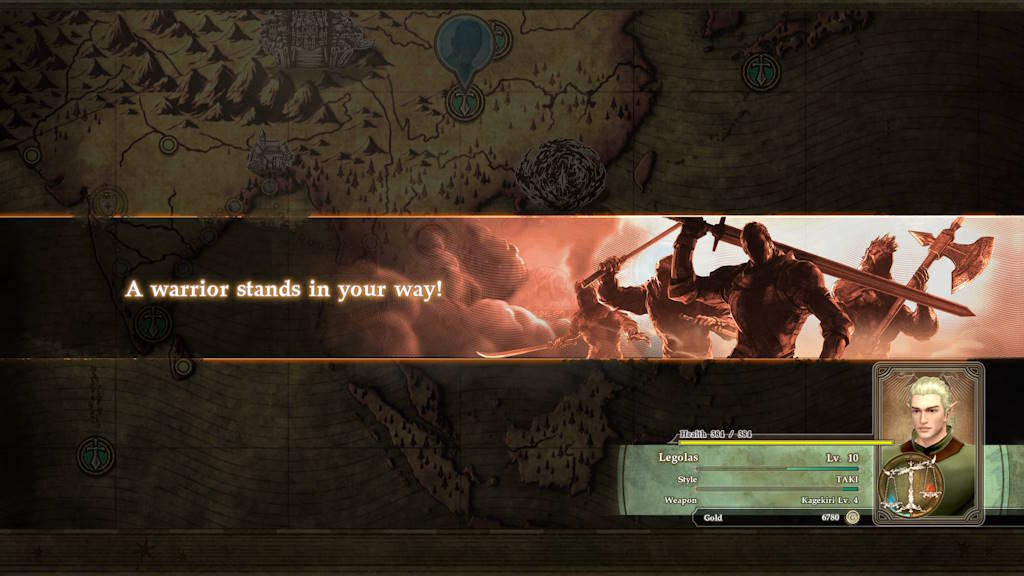
The other reason for keeping your expedition distance shorter, is that as you are outing journeying on one, there is a chance you will be attacked on your way to a side mission. The longer the distance to a mission, the more likely you are to be ambushed. The foe is random, and it may pit you against a series of difficult enemies you’d rather not face, so wherever possible, always plan for the shortest route.
Another guiding principle is to check the level of each side mission before you undertake it, as this should be a rough gauge as to whether your character is strong enough to tackle the foes that await. You should be able to comfortably tackle enemies a few levels higher than you, but if range starts broadening 5-10 levels above you, you could be in serious trouble, because chances are your weapons won’t be strong enough to deal enough damage, and you’ll be hit really hard by the enemy, making your task all the harder.
As you progress further into the game, you can even hire mercenaries to carry out side missions for you on your behalf, and equip them with weapons to aid them in their journey. This means that you can avoid having to actually fight certain missions, and as long as the mercenary is properly equipped, they will emerge victorious. However if they fail, you will be faced with tackling that mission yourself.
Over to You!
You know have everything you need to jump head first in the Libra of Souls and enjoy its opening few hours. There’s plenty to see and do, and with the choices you make, there’s plenty of variety on offer here to make this an enjoyable single player experience.
Don’t worry if you fail a mission, because you can always retry it, and you’ll have lost nothing, so persistence and trying different tactics on a frustrating enemy can often be the way forward if you’re struggling.
It’s also easy to overly worry about missing a side mission that might be locked out if you progress the story too far, or do certain side missions, or make a specific Libra of Souls decision a certain way. But the important thing to remember is to not panic, this mode is designed so that you can’t see and do everything on a single play-though, and so worrying about missing things is redundant, and could detract from your overall enjoyment. The main thing here is to have fun with the main story, and the side missions which appeal to you. If you live by that, you’ll find yourself having a lot of fun with the Libra of Souls mode.


