The complete guide to defeating Nemesis in Resident Evil 3 (2020 remake)
")
Resident Evil 3 is a fantastic remake of an old classic from Capcom, but one thing that constantly puts the pressure on you is the fact that Umbrella’s secret weapon, Nemesis, is after you at a constant pace, never letting you relax for a second. He’s an indestructible fortress, and there’s little you can do to stop him. Throughout the game, you’ll encounter him randomly, and sometimes you’ll be forced to go one-on-one with the mutated behemoth. Thankfully, we’ve got some tips to help you stop him from chasing you if only temporarily. Furthermore, our Resident Evil 3 Nemesis guide, will also help you get through those dreaded boss fights as well.
It goes without saying, but we’ll do so anyway: spoilers aplenty for this boss guide.
GENERAL TIPS
Save your bullets
The first tip in our Resident Evil 3 Nemesis guide is an obvious one, but conserve your bullets. It’s pointless firing any of your guns at him because he won’t feel it. Save your bullets and run. You can get away from him, and it’s never advised to face Nemesis unless the game is nudging you to. Even the grenade launcher doesn’t have the desired effect, and you might find it’ll take a good few shots to floor him. The problem with this, however, is that he moves too fast for you to really test that theory. Run, replenish, and rely on heavier explosives like the rocket launcher.
Electricity is your friend
From time to time, you might find a generator with a green LED light on the top of it. If Nemesis is chasing you and you happen to run past one, make sure you shoot at it. One shot from your handgun is enough to set it off, and doing so will shock him. It’ll cause him to freeze in his tracks, and by electrocuting the big bastard, you’ll be free to escape, grabbing a well-earned respite.
Dodging the rocket launcher
One of Nemesis’ most dangerous weapons is the rocket launcher. He often fires in threes, and it can be difficult trying to get away from the explosions. When he sets his sights on you, the aiming light turns from orange to red. When it’s red, there’s only a handful of seconds before it reaches you. Do your best to press the right shoulder button at the last moment – at least a second after it turns to red. That way, you’re pretty much guaranteed to not get caught in the blast.
BOSS FIGHT TACTICS
Boss Fight #1: Top of the distribution tower
In your first proper fight against Nemesis, he uses a flame flower to burn you to a crisp. Before you know it, the entire rooftop is engulfed in flames, but there is a way to slow him down. The trick is to fire at the gas canister on his back without being seen. One way is to shoot at the electrical supply that is located towards the front of the roof (it has a green flashing light on it). This will electrocute him and cause him to stop. Once he’s temporarily paralysed, run behind him and fire away at the canister (use your shotgun for added effect).
The best way to get behind him is to run around the installations (in a circle) until you get behind him. After shooting at him for a while, the canister will ignite. This is when he starts dashing at you. it can be tricky to evade him, but use the right shoulder button to dodge, then continue to run around the roofing units to get a clear shot of his back. Once it explodes, it’s still not over. He’ll be seriously pissed off at this point, so it’s a case of dodging any powerful attacks he lands just so you can get a good few shots in at him. You should have some explosive rounds, and by using them it’ll be over a lot quicker. Don’t worry about shooting his back, just give him hell wherever you can. He’ll soon fall to the floor, and your nightmare will be over, if only for a short while.
Boss Fight #2: St. Michael’s Clock Tower
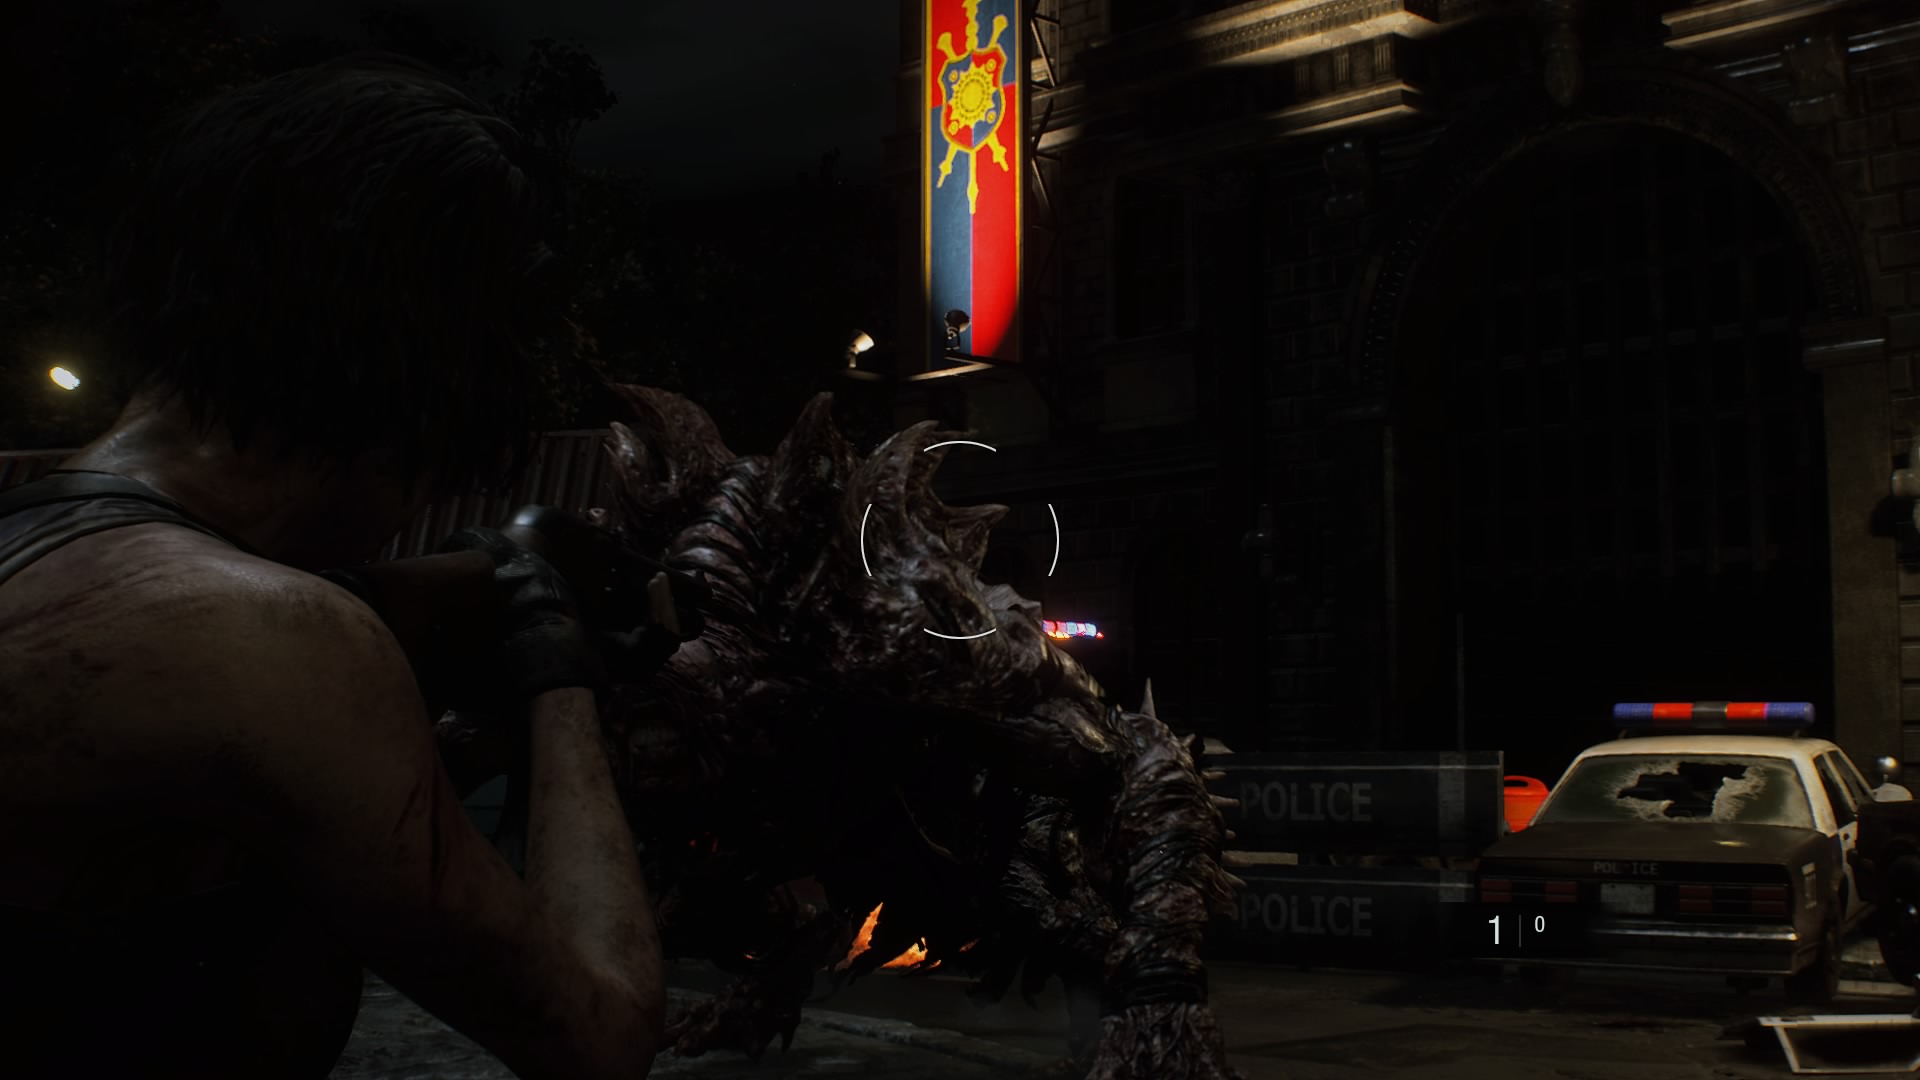
As you approach the hospital, you’ll end up facing Nemesis, who’s now mutated into more of an animalistic incarnation of his previous form. You’ll be relying on mines for your grenade launcher here, but there’ll be plenty scattered around. The fight takes place under St. Michael’s clock tower, with a statue in the middle of the plaza. It’s a circular location surrounded by burnt-out ambulances, police cars, and S.W.A.T. vans. The first thing you’ll want to do is head North East as there’s a healthy supply of shells and first aid sprays. Searching around the perimeter will also get you more mine rounds, and inside one of the S.W.A.T. vans are some flame rounds as well. Nemesis’ attack pattern is easier to track. He’ll run at you, occasionally jumping through the air and landing on top of you, but making use of the dodge is vital. Once you’ve done a fair amount of damage to him, he’ll start running around the rooftops in a circular motion.
The best form of attack here is to preempt his movement by firing a mine round a few buildings in front of him so that once he gets there it’ll blow him off. If you aren’t conservative with your rounds, you may be forced to take him out with your shotgun, so make the best use of your ammo so that you’ll be able to take him down. His most deadly form of attack here comes when you haven’t managed to hurt him as he circles you from above. He’ll eventually climb to the top of the clock tower like King Kong, then leap through the air right on top of you. As mentioned earlier, dodging just as he’s above you will allow you to evade him. Just make sure to blow the living hell out of him before he attempts it again.
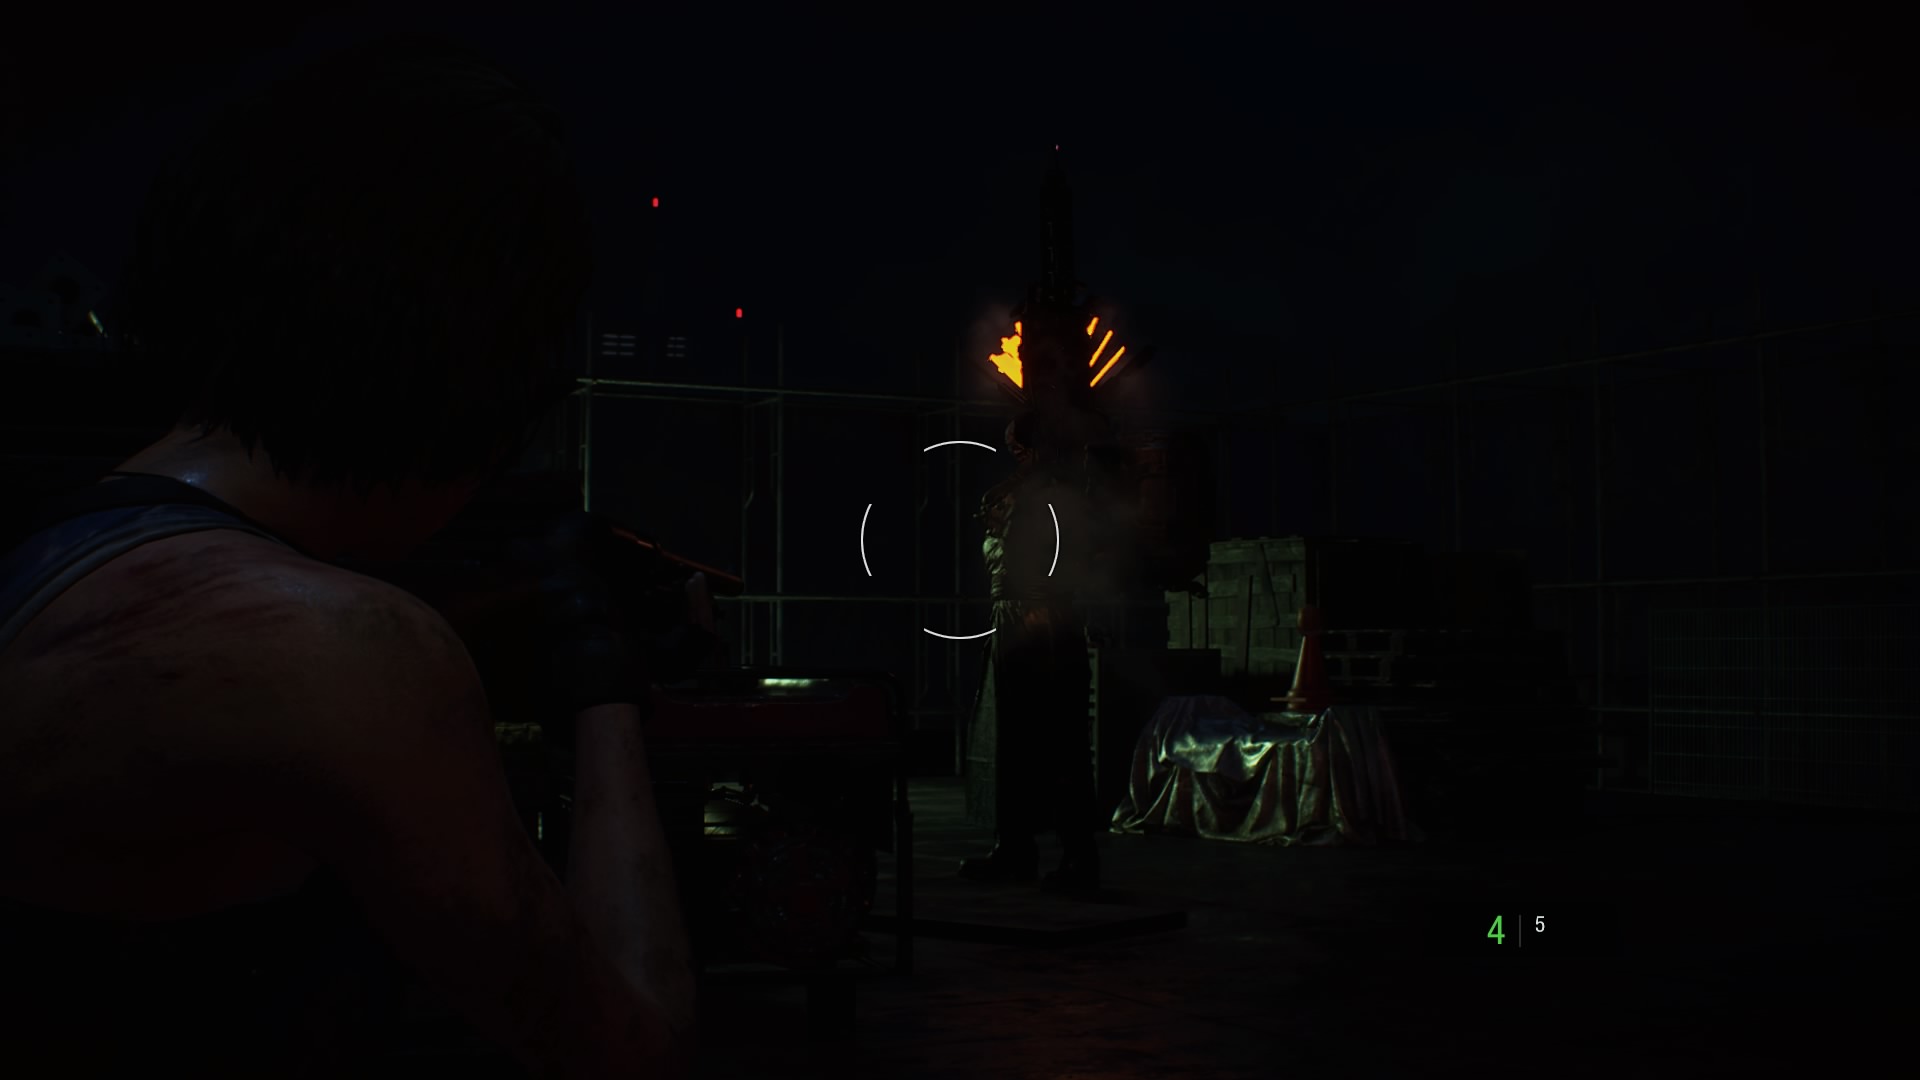
Boss Fight #3 Underneath Umbrella’s NEST 2 facility
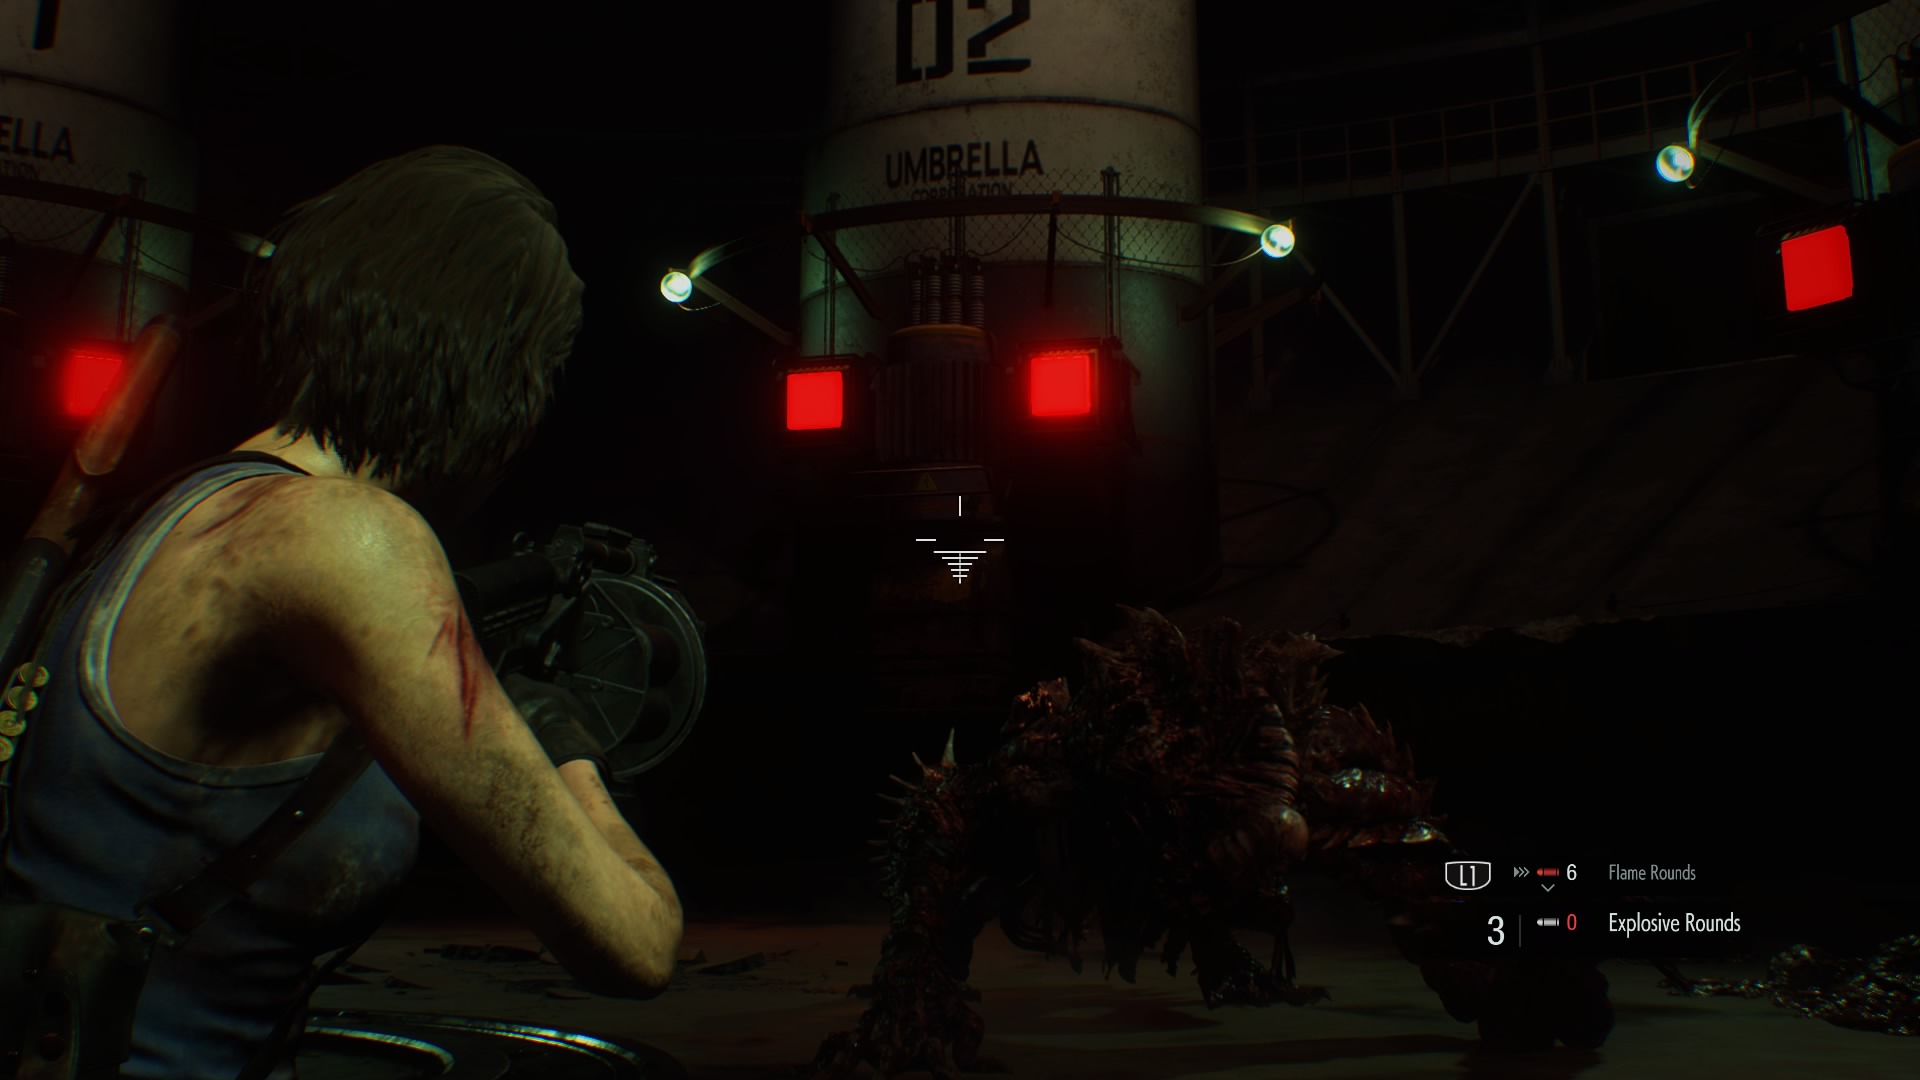
This one is easily the toughest fight, and if you aren’t smart with your actions you’ll find yourself dying over and over again. This time, you’re surrounded by huge canisters with small generators attached to them. It looks like a dingy Colosseum, with Nemesis putting in the overtime to make sure you don’t escape. Whilst he doesn’t look much different to his previous form, he’s now grown huge tendrils out of his arms, and they’re used throughout to thrust towards you. What you’ll want to do is use your flame rounds to wear him down. DO NOT USE THE EXPLOSIVE ROUNDS FIRST! These are much more useful later on. After enough damage, he’ll start to run around like before and circle you from above. Carlos will appear to tell you which canister Nemesis has stopped behind, and once you know you can fire a shotgun shell to electrocute him. He’ll fall to the ground, giving you the perfect chance to fire off a couple of explosive rounds at him.
At the point Nemesis starts running around the walls, two zombies will appear from the sides of the pit. The best thing you can do is conserve your ammo and don’t shoot them unless absolutely necessary. Once Nemesis is shocked and you’ve shot at him, he’ll then try and attack you again. If you tactically move yourself in front of the zombies, Nemesis will charge at you or try and attack you with his mutated arms, but take out the zombies as well. The process of avoiding him long enough until he starts running around again continues for three or four times, despite the amount of damage you do to him when he’s vulnerable.
There comes a point where you may run out of rounds for your grenade launcher. Like underneath the clock tower, there’re plenty of shells, handgun bullets, and first aid sprays around the perimeter, but the likelihood is the rounds for your launcher will run out. Enter, Carlos! At this point, Nemesis will begin to stop on the front of the canisters, and after shooting the generator, Carlos will use a giant crane to flatten him whilst he hangs on for dear life. After three repetitions of this, Nemesis will be defeated until the next time. The biggest challenge is making sure you dodge successfully. Towards the end of the fight, he’ll rely more on his tendrils, and can reach you from quite a distance away. You just need to make sure you’re as far away as possible to avoid him.
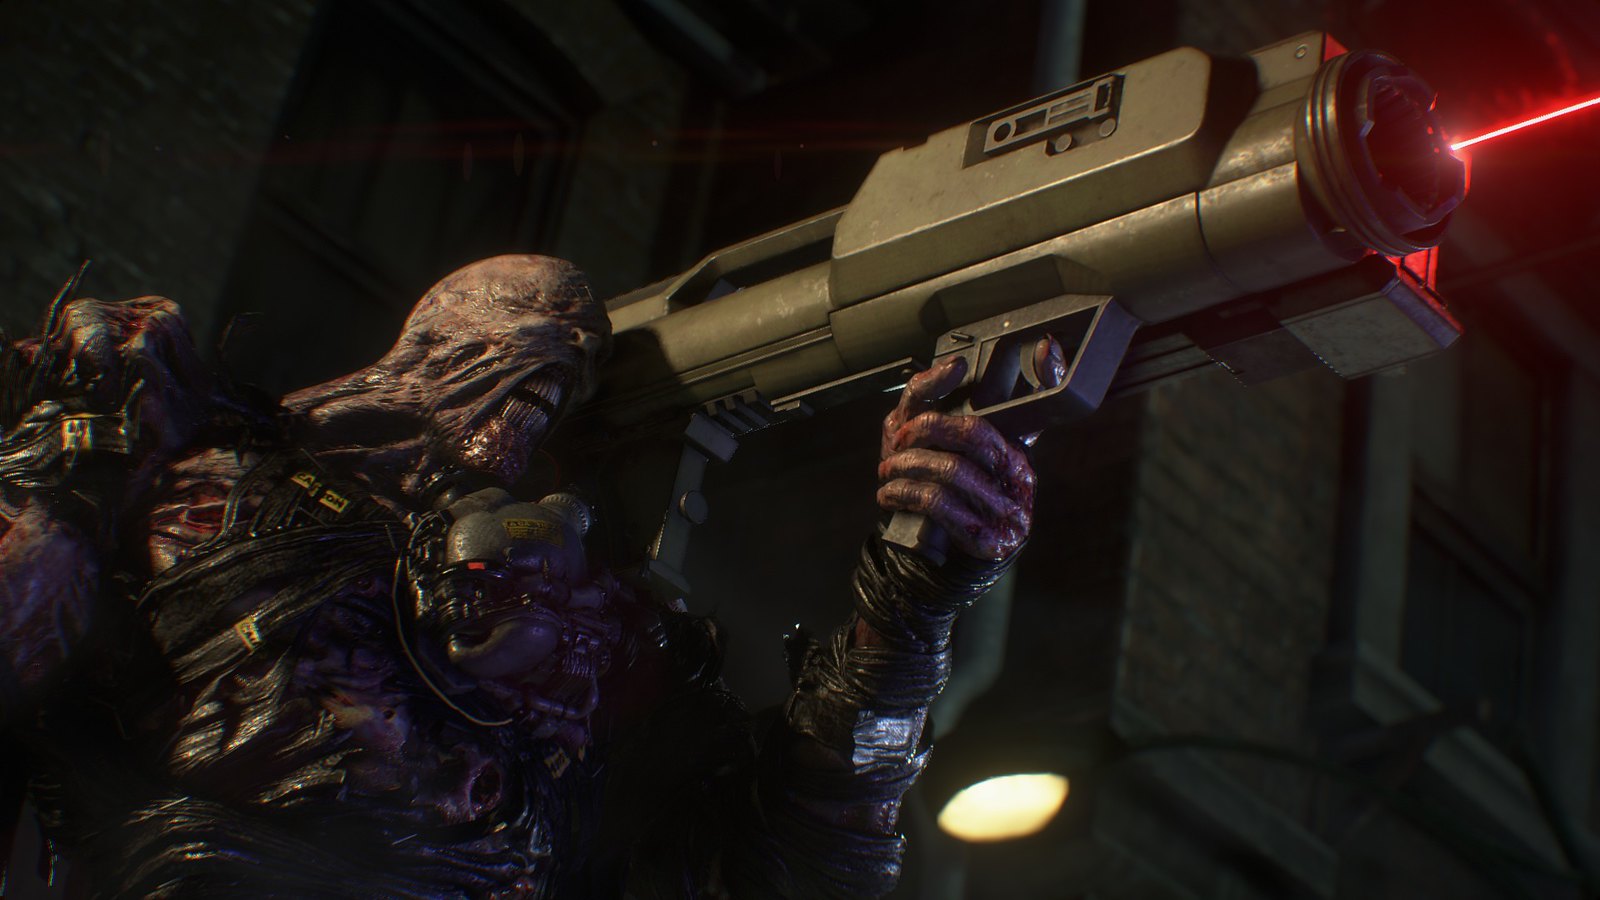
Final Boss Fight: Inside Umbrella’s Railgun Testing Room

This is it, people. Once you defeat Nemesis here, it’s all over. Funnily, this is probably the easiest fight you’ll have, however, one wrong move will kill you instantly. Nemesis has now grown exponentially into a giant blob of puss and gore. He doesn’t physically move, but he’s still got plenty of ways to kill you. Behind you, you’ll find loads of handgun bullets and first aid sprays (three to be precise). Don’t waste a single one on him. Go straight to the middle of the back and pick up the rail gun. It’ll start a cutscene after you fire it, and you’ll see Nemesis take a ton of damage. After it’s been fired, it’ll become inactive and it’s up to you to push in the various power sources into the walls to get it up and running again. Whatever you do, don’t go and try to push them in whilst Nemesis is still upright. He’ll strike you with all the force of a thousand tsunamis and it’ll be game over.
The trick is to make sure you use your handgun to shoot at the boils on his body. They’re the ones firing yellow balls of acid at you. Once you’ve shot them all and they’ve exploded, he’ll fall to the ground. Use this time to push in the power sources. It should take no more than two repetitions of this process to get the rail gun active again, and once you fire it, that’s all it takes to kill him once and for all. Revel in the satisfaction of killing him, do a victory dance around your living room, and pour yourself a nice hot beverage. You’ve earned it!


