Escape Artist is the third escape room in Escape Academy by Coin Crew Games, and here is our walkthrough to help you through every step:
Escape Academy Escape Artist Walkthrough Details
Time to complete: 30 Minutes
Difficulty Rating: 2/5
Walkthrough
Get a Little Perspective
You’ll start in a wide-open courtyard, with plenty of things to look at. But to begin with, you’ll want to head to your left, inside an open door. As you enter, look to the far wall, in the far right corner for a clue about what to do first. You’ll see a whiteboard with the words:
“How to draw good:
Bananas
Cheese
Wine
Wait, this is my grocery list…”
Ignore the offputting final line, you need to find these three items to move forward. Look to your right, and you will see three lockers. The left-hand one contains the “Open Sesame” Painting which we will need later. For now, the middle locker is what we want as it contains our Bananas. Turn around and you should see some drawing easels. Next to these easels, should be some Cheese on a plate. Pick this up. Then finally, round the other end of the easels is a bag containing a Bottle of Wine.
Now you have all three items from the list, move towards the display that the easels are facing. You will be able to interact with it and place the Bananas, Cheese, and Wine onto it. When they are all on the display, position yourself to look at them, and you’ll realise, they actually reveal a three-digit code:
139
If you now return to the lockers, you’ll find that this code will unlock the padlock on the right-hand locker.
Grab the Art Supplies
With the locker open, you can grab the Anti-Invisible Ink that is inside. Up to now, you may have been wondering what all the markings on the far wall are in this room. Well, now it’s time to reveal the mystery with the Anti-Invisible Ink. Go over to the wall and use the Ink to reveal a load of squiggly lines. These lines actually tell you the colour code for the lock to Slip’s Office.
The easiest way to do this is to start from the left, at the colour lock, and follow the lines from each part of the code, to see what colour they end up at. If your line ends up at a weird shape with a “+” symbol on it, it simply means the colour you need is a mixture of two colours, so follow those two new lines to get the primary colours and mix them together to get your answer. Do this for all lines and you’ll have your code.
The correct code for Slip’s Office is:
Red
Purple (Red and Blue combined)
Yellow
Green (Yellow and Blue combined)
Once inside Slip’s Office, you can grab the Spray Paint to create your tag. Now you just need to get to the Monument itself to complete your art.
Shred the Painting
For this next step, you’ll want to use the “Open Sesame” Painting you got from the locker earlier. To the right of the lockers is the shredding frame, where you can place the image so that it shreds into vertical slices. Now you need to rearrange the image so it makes a complete picture. It should be fairly easy to deduce, but if you’re stuck, remember that the artist signature goes on the far left, followed by the girl with the balloon, and then the girl with the burst balloon on the right.
Once done correctly you’ll hear the familiar Escape Academy tune, and also now have the correct directional combination to the Art Lab.
Go to the Art Lab door opposite and enter the following code:
Right, Left, Right, Up, Down, Down
And enter the Art Lab
Explore the Sculpture Garden
In the Art Lab, you’ll ultimately want to be opening the safe to the left as you enter, but to do that we’re going to need to do some more puzzle solving first.
Begin by using the scanner on the right side of the room. Use it across all four canvases. Firstly take note of the pictures on the first three canvases:
Well
Cube Sculpture
Keyhole Sculpture
These will be needed in a moment. Then scan the final canvas which will detail 9 shapes on a 3×3 grid. It is worth making a note of these shapes and their positions on a piece of paper for now (or use a co-op partner for reference if you have one).
Now we need to head outside and find the Well, Cube Sculpture and Keyhole Sculpture. What you’ll notice when you find each one, is that they have a shape spraypainted on in yellow paint. Make a note of each one. You should find that:
Well – Empty Square
Cube Sculpture – Empty Circle
Keyhole Sculpture – 3 dots
Now if you refer to your 3×3 grid, you’ll notice that these shapes are all present, and on the grid, they correspond to the following positions:
Well – Empty Square – Middle Row Left
Cube Sculpture – Empty Circle – Middle Row Right
Keyhole Sculpture – 3 dots – Bottom Row Left
Now return to the safe, and press the buttons:
Middle Row Left, Middle Row Right, Bottom Row Left
Inside the safe, you will find a Strange Sculpture as well as a picture of a specific shape of a vase.
Open the Hall of Escapists
Return outside to the Sculpture Garden and head over to the opposite side to a door with a face on it. Use the Strange Sculpture on the door to place its nose. You’ll now notice that you can tweak the mouth, eyes, and eyebrows on the face. The idea is you need to get the right combination to unlock the door.
The key to this is the picture of the vase you saw in the safe, as that outline shape will lead you to the truth. Along the same wall as the door are many different variations of the face set upon vases of different shapes. You need to find the three vases that match the shape of the one you found in the safe. Each of those three face pictures will detail one of the three feature combinations. Find them all, and then replicate the combined face to unlock the door. If you’re struggling you need to do the following:
Mouth: Half open
Eyes: Both looking right
Eyebrows: Both angled from bottom left to top right
Once you have the face correct. Use the nose knocker, and the door will open.
The First Gallery
Enter the Hall of Escapists, and ahead of you is a statue. Either side of that statue is a key you can pick up – the 2 Key and the 5 Key. You’ll see there are three locked gates before you, each requiring keys to enter. Look up towards the top of the gates, and you will find some spraypainted numbers on them. One is 5, another 10, and another 7. Given that 2+5=7, we want to use our keys in the 7 gate.
Once the gate is unlocked we need to solve the puzzle of the First Gallery. Here we are presented with four busts, and have the opportunity to move them from side to side or keep them facing forward. The key is getting the right combination to progress. The solution actually lies just back outside the room. If you exit the gallery and then turn round, you’ll notice there are four images adorning the walls around the gate. They each represent one of the busts, and show which way they need to be facing. Follow this and you’ll complete the puzzle. If you can’t quite work it out the solution is as follows:
Max: Left
Megan: Right
Belen: Left
Fergus: Right
This will open up an alcove behind the busts, where you can pick up three more Keys. They are Key 3, Key 4, and Key 7.
The Second Gallery
The second gallery you’ll want to go into now is the gallery with 10 painted above it. Use the Key 3 and Key 7 to unlock the door. This time we have 6 busts, and in order to solve the puzzle we need to smash certain busts. Again finding the right combination of which busts to smash and which to leave alone is the key.
As before the clues are outside the room and the picture dictate various characters from the busts in bits and pieces. You’ll want to smash any bust who appears in bits in those pictures and leave the rest. If you’re struggling the solution is you need to smash the following busts:
Timmy, Michelle, Windsor
As before, completing the puzzle opens up an alcove, and this time your reward is a single key, Key 1.
The Final Gallery
It should be pretty clear what to do next. Take your new Key 1 and use it with Key 4 on the last remaining gate. This unlocks the final gallery, with five busts this time, that need to be put in the correct height order. Again use the outside pictures for guidance.
You’ll want to pay attention to which characters are taller than others in pictures. But also take note of how tall certain characters are compared to a fence which features in a few pictures. This should give you all you need put them in the correct order, but if you need assistance, see the below solution:
Women, Man with Glasses, Woman with Glasses, Bald Man, Man in hat
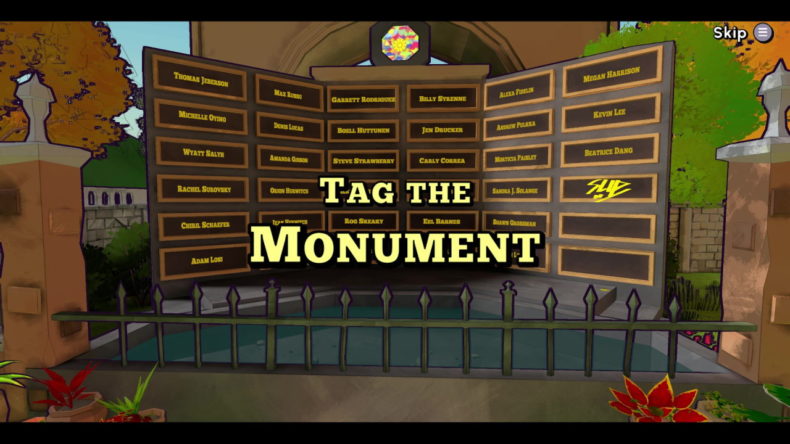
This time the back of the room reveals an exit up some steps for you to follow. Do so and you’ll reach the Monument. Use your Spray Paint to tag it and complete the Escape Room.


-1-1-85x85.jpg)


